Saturday, June 30, 2012
Stormwall
Although I didn't paint this beautiful Cygnar Colossal, I wish I had! This is the work of co-worker Jarrett Lee, one of the more talented painters in the hobby. His work has appeared in several CMON Annuals, and he's a multiple award winner.
Jarrett sells most of the stuff he paints, and I was lucky to be able to acquire his Stormwall. Now...to put together a Cygnar battle force or not...?
'Til next time.
Friday, June 29, 2012
Step-by-Step: Cryx Bloat Thrall
Yes, yes, I know...there was no Bloat Thrall on my "to do" list when I got back from vacation. However, over the past week, I booked into GenCon in August, and registered for several Warmachine events. One of them is a 50-pointer, and when I put some lists together I realized I could probably use a Bloat Thrall.
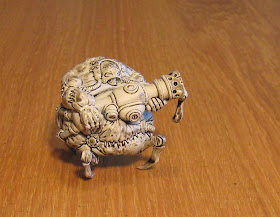
So, since I'm probably going to need one anyway, why not do it right away and whip up a tutorial? OK...so first off, the assembled model. This went together very quickly, the casting was clean, and I quickly realized that the sculp is fantastic. So much deep relief and plenty of chunky detail...great for painting.
The only problem I ran into were the gaps along both sides of the assembled model.
Liquid green stuff filled these in short order.
At this time, I went ahead and did the base. The figure pretty much hides the complete base, so nothing fancy here. Sand and glue.
Followed by some quick paint, drybrushing and static grass. This was then set aside as work continued on the main model.
OK, started with a spray of white primer.
Followed by the dark wash (as always, this is a mix of Future floor wax, black and brown paint, and some matt medium to flatten the finish).
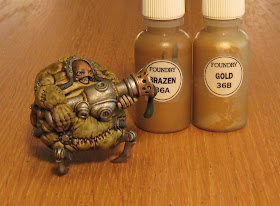
Now on to base colors to block out the main parts of the figure. The flesh is Moldy Skin covered with patches of Khaki Shadow. The metal pieces are based in Blackened Steel. Brass starts with some Foundry Brazen. Rubber gets...Dark Rubber. The leather hood starts with Russet Brown and the goo in the cannon nozzle is painted in Gnarls Green from P3.
This is just a block painting pass. As you can see, the base coat application is very light and watered down. There will be several layers of paint on the figure, so keep the paint thin to prevent clogging up detail.
Then the entire figure is washed with Sepia Shade.
I started with the leather hood. You can see the progression of colors here, using a set of Reaper browns. The final highlight was done with a Foundry pale brown which is from a German camouflage color set.
The metal is quite simply done with some Chainmail drybrushed over the Reaper base. I didn't spend too much time on the metal, because I knew I was going to heavily stress it with rust paints later.
The brass fittings get Foundry Gold over the Brazen base. They are also highlighted with Chainmail.
Hoses next. Vallejo has a nice dual set of rubber colors, which I use on lots of models.
Finally, it was time to address the skin. This is the main showcase of the Bloat Thrall, so this is where I spent most of the time on the model. I wanted the skin to look distressed and ropey, so there was plenty of brushwork involved. This was done with Moldy Skin and Bloodless Skin.
Next, bruising, infection and irritation...mmmmm. I dug out the great Citadel purple wash and applied that first for bruises. Next, Red Shade went into all the stitching. Finally, Umber Shade was liberally applied randomly over the surface. As you can see in the photo, all these washes made the figure quite dark. I then went back over the model with Moldy Skin to bring the highlights back. You can see this effect in later photos.
Time to distress the metal. I used four shades of rust, watering them down in a pallet. To each pot, I added a few drops of rubbing alcohol. This breaks the surface tension of the washes, and lets the rust colors run into seems and settle nicely on the model.
I started with the darkest rust color and moved up to the lightest. I then went back over the metal with a dark wash and just ran it into crevasses to make the metal areas pop out appropriately.
OK, time for goo. I used P3 paints for this and just worked up the greens to an off-white dot highlight. The model was then sprayed flat, and the goo got some Future floor wax for a glossy finish.
And that's it.
This type of treatment makes for a pretty convincing undead horror.
'Til next time.
Sunday, June 24, 2012
Khandish Warriors
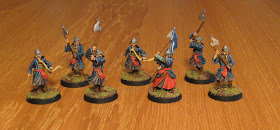
Of the projects on the table, I figured I needed to start out with the Middle-earth figures, because a) I was feeling rusty, and these figures were simple enough to practice on, and b) I have a game coming up, and I needed them!
I also worked on this NPC magician figure. This was my first attempt at point source light painting technique, and I'm not happy with the result. I'm trying to get the glow from the orb to cast orange light onto the figure's cloak.
I'm going to have to read a few more articles on the technique and see where I can improve this lighting trick.
If anyone has a suggestion of where to go for a good article, please let me know.
'Til next time.
Saturday, June 16, 2012
Back in the Saddle
Hello!
Hope you are all doing well!
I last posted near the end of April, and since that time, my wife and I have been off on our great European adventure. As fun as that trip was (travelogue in the process of being posted here) it's nice to be back in the hobby room.
Spending a month and a half away from modelling and painting leaves you with little else to do but dream up new projects. So, no surprise here, the backlog is filling up fast!
Here's a review of what's on the hobby table coming up.
First, I'd like to get a step-by-step article up on distressing metal, but this time without using weathering powders. I picked up a unit of Cryx Bane Knights before I left on vacation, and started into them. At this point, they just have a few colors down. I'd like to get this post up within the next couple of weeks.
I think you can see the sort of end result I want to show with this article.
I also have some Middle-earth RPG figures I want to knock out for an upcoming game. More Khandish soldiers...this time unmounted.
And an RPG NPC.
While in Firenze, Italy a few weeks back, I picked up a cheap plaster statue that I want to use as the basis for a marble painting project. This will (I hope) eventually become the centrepiece for a scale garden or park terrain feature.
I had been hearing some good things about Fantasy Flight's new miniatures game, Dust Warfare. I just picked up the rules this week...
...along with an armor unit. I'm going to do a re-paint on this fine model, so I'll post a step-by-step on that as well...maybe next month.
I spent some time in Normandy, France back at the beginning of May, and took a tour of several Canadian D-Day campaign battlefields. This inspired me to order up a nice unit of Artizan miniatures Commonwealth infantry. The project I'm thinking of here is Regina Rifles and Fort Gary Horse, along with their 12th SS foes during the push on Caen. That's still in the mail, so is a little ways off from getting started.
Well, plenty to do and look forward to, so off we go. Like I said, it's nice to be back, and I'm itching to get painting again. Looks like a busy summer ahead.
'Til next time.


