Sunday, January 25, 2015

Demo Corps and Forsaken

This week I'm back to the Tale of Warmachine Painters 100-points-in-a-year painting challenge. So, for January we have a min-unit of Man O' War Demolition Corps and two Forsaken.


I painted one of these snow-camo Khador pieces back in December as a test figure. I'd been watching some weathering demos on YouTube and wanted to try out a few techniques. I'm happy with how they all turned out.


Even though they have worn down snow camo, they still fit in with my other dark grey Khador pieces.


I also finished off a couple of Forsaken figures from Legion of Everblight. Personally, I don't like these sculpts. They're too small and just a little on the funky side. Anyway...


'Til next time.

Sunday, January 18, 2015

Red Dragon: Reaper's Pathfinder Red Dragon Step-by-Step

This weekend I finished off the Reaper Red Dragon I started up last week. Wonderful sculpt...love the figure.


As I noted last week, though large, the figure only comes in about 6 pieces, and the casts are pretty clean. Putty was required at the joints, and the wings were pinned.


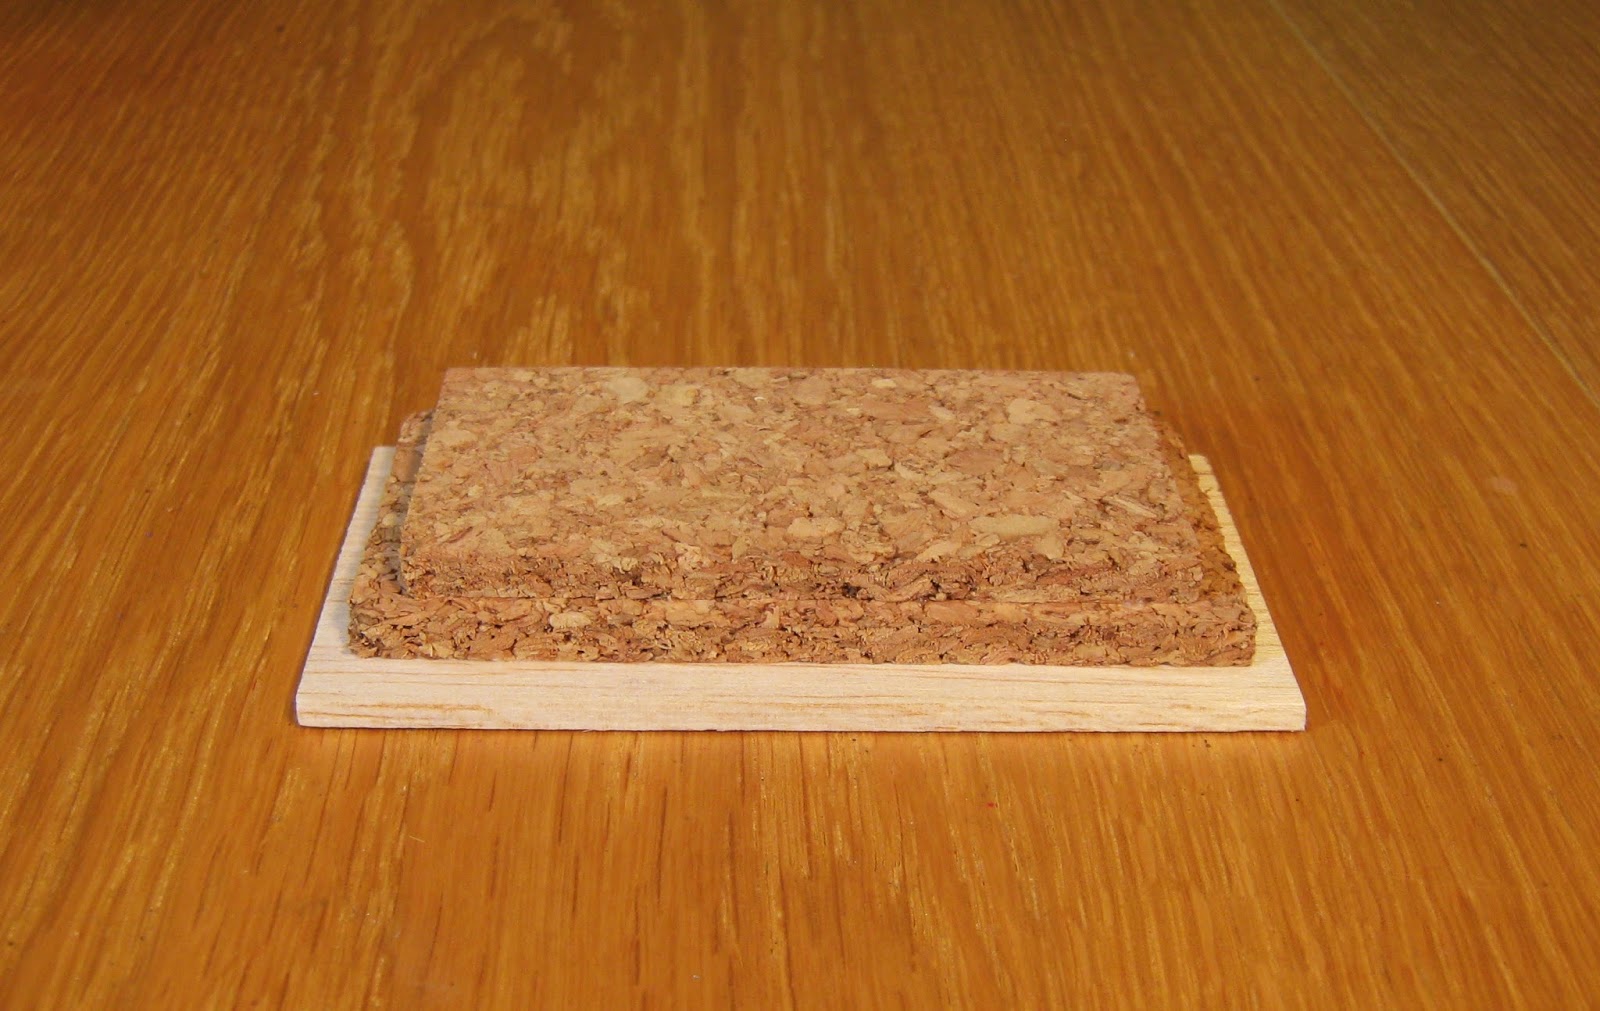
The base is made of balsa and cork sheet.


I added resin pieces to give the base some visual interest.


The dragon was primed white, while the base was given a coating of black.


The overspray is inconsequential at this stage.


The whole thing was given a coat of floor wax mixed with a little dark paint. This sealed the primer coat and provided pre-shading for the figure.


The first airbrush pass was with Vallejo Pure Red surface primer. Great coverage with this red...like it a lot, and it's airbrush-ready. The dragon was then given a highlight of Game Air Orange Fire. The wing membranes were first given a spray of Hull Red around the edges of the vanes to pre-shade them. Then, the wings were covered in Game Air Leather Brown


Airbrushing does tend to soften detail, so the entire figure was given a wash of Vallejo Red wash to pop the scales back up.


The wings were then finished off with a highlight of Game Air Khaki.


Over to the brush work. This next step took some time...I did it over three painting sessions. Each scale was hit with a highlight of Citadel Blazing Orange. The belly scales were then given a coat of P3 Ember Orange and a wash of Fleshtone Shade.


Time for details. The belly scales were highlighted with Foundry Canvas and Citadel Bleached Bone. The inside of the mouth and tongue were painted with shades a pink and then washed with red. Finally, all the horns, claws and teeth were painted with Reaper's bone colours (and later given a weak wash of light yellow-brown).


With the dragon done, it was time to move onto the base. The steps and platform were painted with Reaper's Redstone. Then, all the rubble was given successive coats of Foundry Granite, Vallejo Stone Grey, and finally, Citadel Bleached Bone.


And there you have it...one Red Dragon.


I really like how it turned out. It's a simple paint scheme, but the dynamic sculpt is what gives the figure its visual interest.


Hope you found this helpful. Please let me know in the comments section if you have any questions!


'Til next time.

Sunday, January 11, 2015

Red Dragon WIP...and Slimes!

 This week I started up a sort-of-ambitious project: The Pathfinder Red Dragon from Reaper. This model is on the large size and relatively heavy. However, the only parts that required pinning were the wings.

The model is moulded into a few scenic items, which really don't do it justice.


I decided to invest into making a more elaborate display base. This started with a 4"x2" rectangle of balsa wood, and was built up with a couple of layers of cork sheet to create a kind of stepped platform.


The Red Dragon was glued onto the base along with a number of resin pieces from Scibor, slate and small gravel bits. Next up...paint.


Besides the dragon project, I painted up a couple of quick slimes (again from Reaper).


Slimes, jellies, ochres...what is it with D&D's fixation on barely sentient goo?


'Til next time.

Sunday, January 4, 2015

The Hobby Table 2015 Edition, and Three Figures

I've recently made some changes to my painting and hobby area. I'll admit, I'm quite fortunate...I am able to dedicate a complete room to building and painting stuff. So, I've taken advantage of the situation, and have laid out the space in the following way.

Under the window is the main painting area. Airbrush station on the left, and brush painting area on the right. I have a computer handy to listen to podcasts or watch painting YouTube videos while working on projects.


The shelving on the left side of the room contains WIP projects (there is a pile of primed Tabletop World buildings, for instance) and the "bins of shame." The bins contain projects that I've started into, but haven't finished. However, whenever I get an itch to get back into one of these old projects, I have quick access to them.


On the right side of the room I've recently set up a couple of shelves for paint racks. For the past couple of years, I've had my paints stored in a stack of plastic bins. But finding the paint I wanted was always a chore...now that all the colours are out and arranged by hue, getting to the set I need for a particular project is a lot faster.


The racks are from Back 2 Base-ix, an organization down in Australia. They come flat-packed, but are pretty fast to assemble...recommended.


And now on to this week's painting projects. Three figures completed. The first two are a couple of Reaper flying lizard men.


I had completed a test figure last month, and just followed suit on the scheme with these guys.


Here are all three of them together.


I've also had this lone RPG elf wizard figure sitting around for some time. He was half-painted and waiting to be finished off.


 Object Source Lighting effort was not great, but gets the idea across.


Well, the airbrush is calling, so back to it.

'Til next time.

Thursday, January 1, 2015

2015 Starts Out With a Golem and Undead

Holidays...time to paint!

First figure off the hobby table in 2015 is this Mage Knight metal edition Storm Golem. Crappy sculpt, but I did a couple of minor conversions to mask the worst parts of the figure. The weird chest spike was replaced with a Reaper shield, while the gimpy backpack on the original figure was replaced with a Nomad shield from Privateer.


Anyway...started this figure last night, and since it's mostly just metal, it went very fast. Nice RPG metal golem of whatever sort.


I ordered in some Mantic undead about two months ago. It was a mixed pack of zombies and ghouls. They were supposed to have swappable torsos...so when I got the figures in, I just clipped out five leg sets and five upper bodies. I glued them together without properly matching them up. The result...a requirement for greenstuff putty filler! So, the compatibility is only moderate.


Regardless, Mantic does produce some very cool undead figures. I really like these guys. Very animated and creepy.


I still have some more RPG figures to clear off the table...we'll see how long I can keep this up before my attention wanders somewhere else. Like to Greece!

'Til next time.