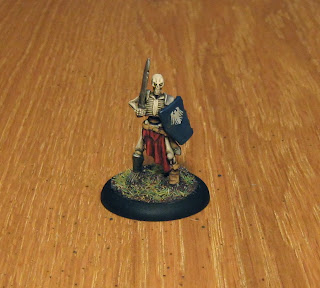
So, my last project for our local Journeyman League was a large unit. The requirement was to paint a unit of at least 10 figures. Well, I had Alexia and the Risen sitting around. Now, Alexia starts the game with 9 Risen in play...but she can accumulate up to 20 by gathering corpses. The box set comes with 10 undead, so I figured an interesting project would be filling out the rest of her Risen with spare undead models I had sitting around from Mantic and Lord of the Rings. Then, adding in a couple of her Thrall Warriors, I was able to submit a 23-man unit for the last painting challenge in the league.
And, here they are...Alexia and the Risen.
Now, there are a lot of skeletons in this unit, so I'm going to take this opportunity to add a skeleton painting tutorial into this post. First off, skeletons are fun and easy to paint.
Step 1. After assembly and basing, prime white and add a dark wash.
Step 2. Apply a very thin layer of dark bone color. I use the Reaper bone shades...starting with Bone Shadow.
Step 3. Build up layers of lighter colored bone shades (Aged Bone and Polished Bone in this case), and then blend all the layers together with a sepia wash.
Step 4. I applied the last bone highlight layer later in the painting process...actually, it was one of the final steps. I was trying to gage how much I needed the bone color to pop out on the game table after I had the rest of the figure painted. Anyway, the final highlights were painted on with a very thin layer of ivory. As always, you want to just hit the raised features with your highlight layer. This enables the stark bone to really be visible on the tabletop.
Step 5. In any event, back to the rest of the figure. After the initial bone colors are down, I moved on to metal. This is a layered process as well. Shadowed Steel goes down first...then a careful drybrush of Chainmail, followed by a wash of Umber.
Step 6. After the wash dries, a final highlight of metal is drybrushed on (Chainmail and Mithril Steel from the old GW line of paints).
Step 7. Last comes the clothing and leather. I chose red cloth for the figures, to give them a unified and ominous look. All the belts, collars, boots etc. got hit with leather brown. The reds and browns were layered as well to add as much depth to each figure as possible. Then finished the basing, and that was that.
Here is Alexia with the 10 Risen that come in the box. I did some head swaps to add variety to the limited number of poses.
And here are the additional 10 undead figures...most are Mantic skeletons, but there are a couple of Lord of the Rings figures in there as well.
I also did two Thrall Warriors, as Alexia has the ability to generate one of these solos per round.
For our Journeyman League we were also challenged to paint a unit attachment. So, I did a quick Gun Mage Officer figure for Cygnar.
All in all, a pretty productive week at the hobby table.
'Til next time.


Beautiful painting! I may have to check out those Reaper paints...
ReplyDeleteHey Kevin, here's a link to a post on those "color shift" paints I was mentioning yesterday: http://arcanepaintworks.blogspot.ca/2013/11/pearl-and-color-shift.html
ReplyDeleteThanks Alex!
Delete